Do you want to use the WordPress desktop app for your self-hosted WordPress.org blog?
The WordPress desktop app allows you to easily write and edit blog posts without being distracted by other browser tabs.
In this article, we will show you how to use the WordPress desktop app for your self-hosted WordPress blog.
Why Use the WordPress Desktop App? (Pros & Cons)
The WordPress desktop app was created by Automattic, the company founded by WordPress co-founder Matt Mullenweg. It is also the company behind Jetpack and WordPress.com. For details, you can see our article on the comparison between WordPress.com vs. WordPress.org.
The WordPress desktop app offers an improved user experience for self-hosted WordPress websites, which is particularly great for users who are looking for a distraction-free editor to create content.
However, just like everything else in the world, it has its own pros and cons.
Pros
It offers a nice user interface to manage your website.
It syncs your content fast and offers a great writing experience.
The app offers a distraction-free writing area to create your content.
It allows you to perform website management tasks without opening your browser, like updating plugins and answering comments.
Cons
It doesn’t work while offline. This means you cannot write posts and just save them to your computer using the desktop app.
It requires you to install the Jetpack plugin and sign up for a WordPress.com account.
That being said, let’s take a look at how to use the WordPress desktop app for your self-hosted WordPress.org site.
Using WordPress Desktop App for Self-Hosted WordPress
The first thing you need to do is install and activate the Jetpack plugin on your website. For more details, see our step-by-step guide on how to install a WordPress plugin.
For this tutorial, we will use the Jetpack free version. Jetpack also offers premium plans to get started.
Upon activation, you can go to will be asked to connect Jetpack to a WordPress.com account.
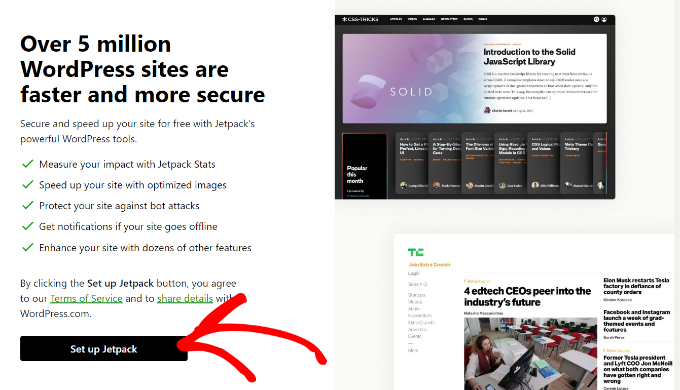
You need to click on the ‘Set up Jetpack’ button to continue.
This will take you to the WordPress.com website. If you already have a WordPress.com account, then you can log in and click the ‘Approve’ button.
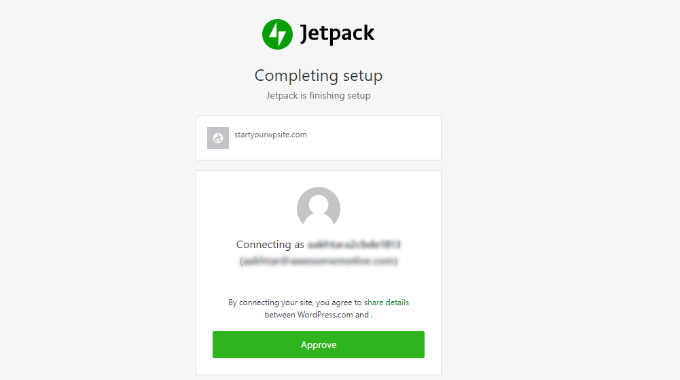
Alternatively, you can create a new account.
After signing in, you will be taken to the pricing page. Simply scroll down to the bottom of the page and click the ‘Start with Jetpack Free’ button.
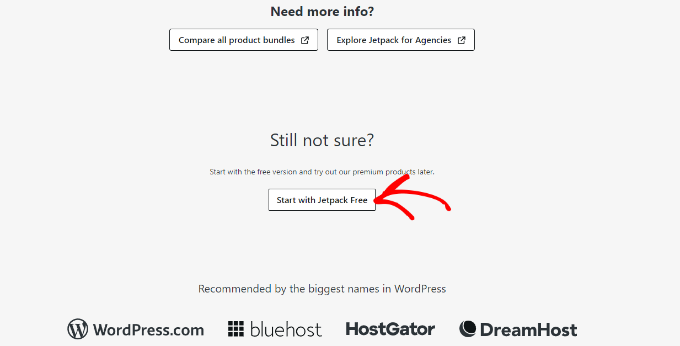
WordPress.com will now create your free account, and you will be redirected back to your website.
Installing the WordPress Desktop App
Next, you need to download and install the WordPress Desktop App on your computer.
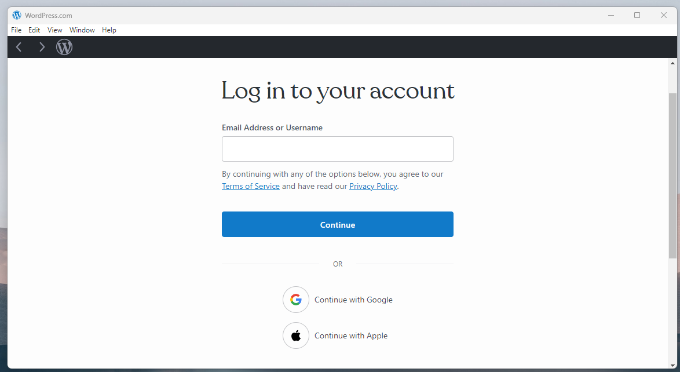
After installation, go ahead and launch the app. Here, you will see the login screen where you need to enter your WordPress.com username and password to log in.
Once logged in, you will see the WordPress.com reader screen, where you can explore content and follow blogs. To manage your website, you will need to switch to the ‘My Sites’ tab.
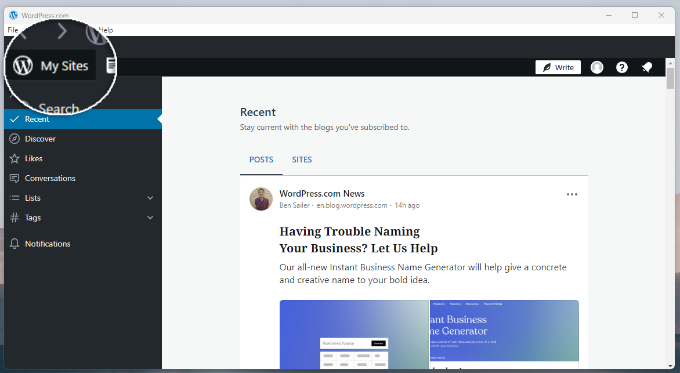
You will now see your website title in the left menu, along with other website management sections. In the right column, you will see Jetpack traffic reports.
Creating a New Post in the WordPress Desktop App
Using the admin bar on the left column, you can edit and create posts, pages, and custom post types. You can also add a new blog post by clicking on the ‘Write’ button at the top.
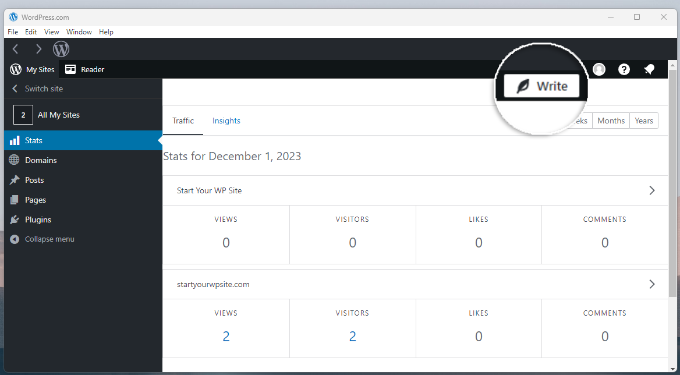
When you click the button, you might see different websites associated with your account.
Go ahead and select your website.
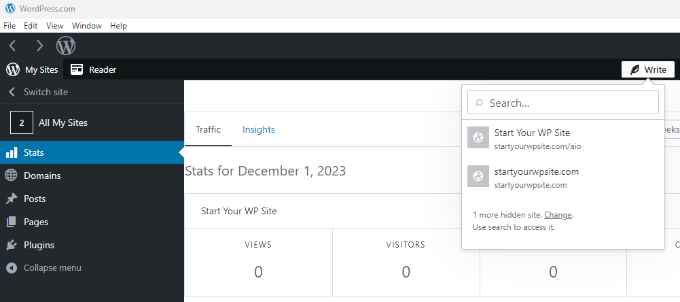
From here, simply log in to your website.
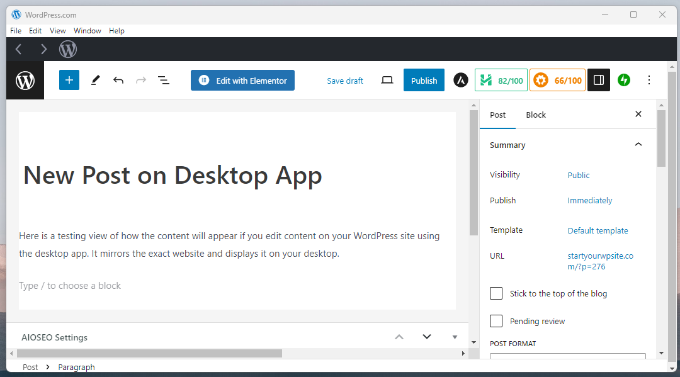
After that, the content editing area offers a very polished user experience. It basically mirrors your WordPress site in the desktop app.
You get to experience the block editor but on your desktop screen.
Managing WordPress Themes in the Desktop App
Next, you can also view the WordPress admin panel in the desktop app.
For instance, you can go to ‘Appearance’ and manage themes installed on your website. You can also install a new theme without leaving the app.
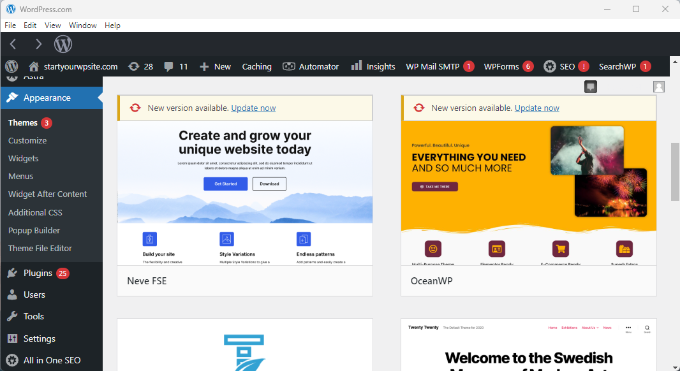
If you click the ‘Customize’ button, then it will open the Theme Customizer or the Full Site Editor, depending on the theme you are using.
Managing Plugins from the WordPress Desktop App
The ‘Plugins section allows you to install, upload, and activate plugins directly from the app.
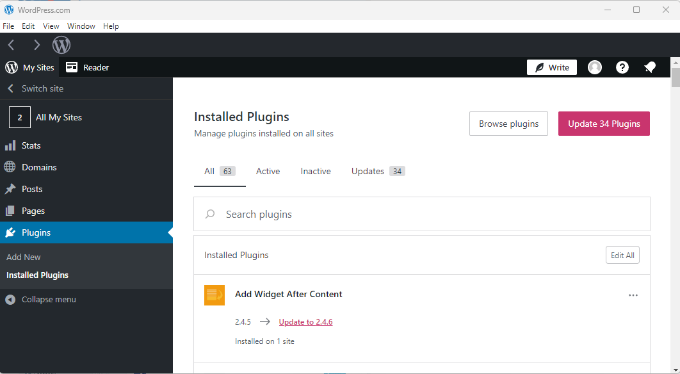
The app will also notify you of plugin updates, and you can update them directly from the app.
You can also optionally auto-update plugins that you trust.
View Posts and Pages from the Desktop App
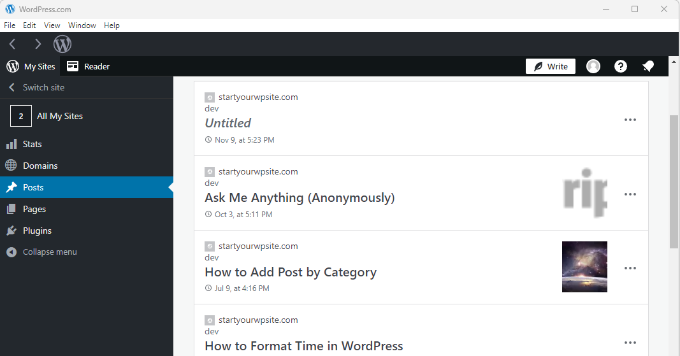
Next, you can view all the pages and posts on your site from the desktop app by going to ‘Posts’ or ‘Pages’.
There are options to edit, view, look at stats, and trash the posts and pages.
Adding New Websites to the Desktop App
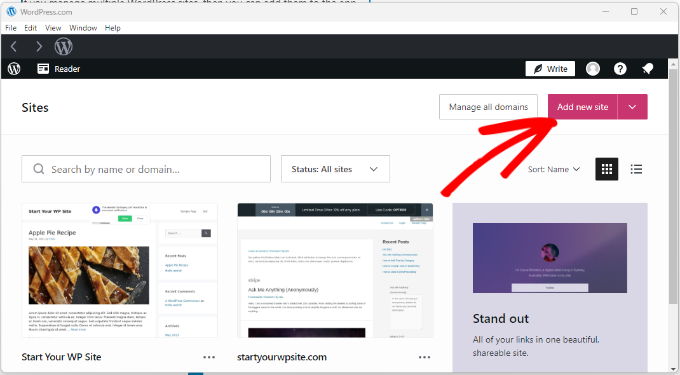
If you manage multiple WordPress sites, then you can add them to the app and manage them from the same dashboard.
Any new website you want to work on should have Jetpack installed and be connected to the same WordPress.com account you are using in your app. After that, you can simply click on the ‘Add new site’ button in the app to add them.
We hope this article helped you learn how to use the WordPress desktop app for your self-hosted website. You may also want to see our list of the must-have WordPress plugins to grow your website and our guide on how to use the WordPress app on your iPhone, iPad, and Android.
If you liked this article, then please subscribe to our YouTube Channel for WordPress video tutorials. You can also find us on Twitter and Facebook.

